
How to Calculate Privacy Fence Material Needs
Last Updated: November 2, 2026
Quick Summary
To learn how to calculate privacy fence material needs, measure each straight fence run in feet and total them, then divide that length by your post spacing and add one post for the end. From there, convert total length to inches and divide by picket width plus gap for boards, multiply sections by rails per section, and add 10 percent to pickets and 5 percent to rails and posts.
- Measure each straight run separately, round up to the nearest foot, then add the runs together.
- For an 86-foot run at eight-foot spacing, round 10.75 up to 11 sections and add one post for 12.
- Post length equals fence height plus embedment depth plus 6 inches of margin, so a six-foot fence with three-foot embedment needs ten-foot posts.
- Multiply sections by rails per section: 11 sections with three rails each equals 33 rails.
- Add 10 percent to boards and pickets and 5 percent to rails and posts for waste and cuts.
Table of Contents
- How to Measure for a Fence: Getting Accurate Dimensions
- Choosing Fence Type, Style, and Height
- Privacy Fence Post Spacing and Post Quantity
- How Many Fence Boards Do I Need for a Privacy Fence?
- Calculating Rails and Structural Components
- Using a Privacy Fence Material Calculator
- A Complete Privacy Fence Worked Example
- Get a Quote and Order Your Materials
- Frequently Asked Questions
How to Measure for a Fence: Getting Accurate Dimensions
Learning how to calculate privacy fence material needs starts with one tape measure and one honest walk around your yard. Get the dimensions right, and every number after that falls into place.
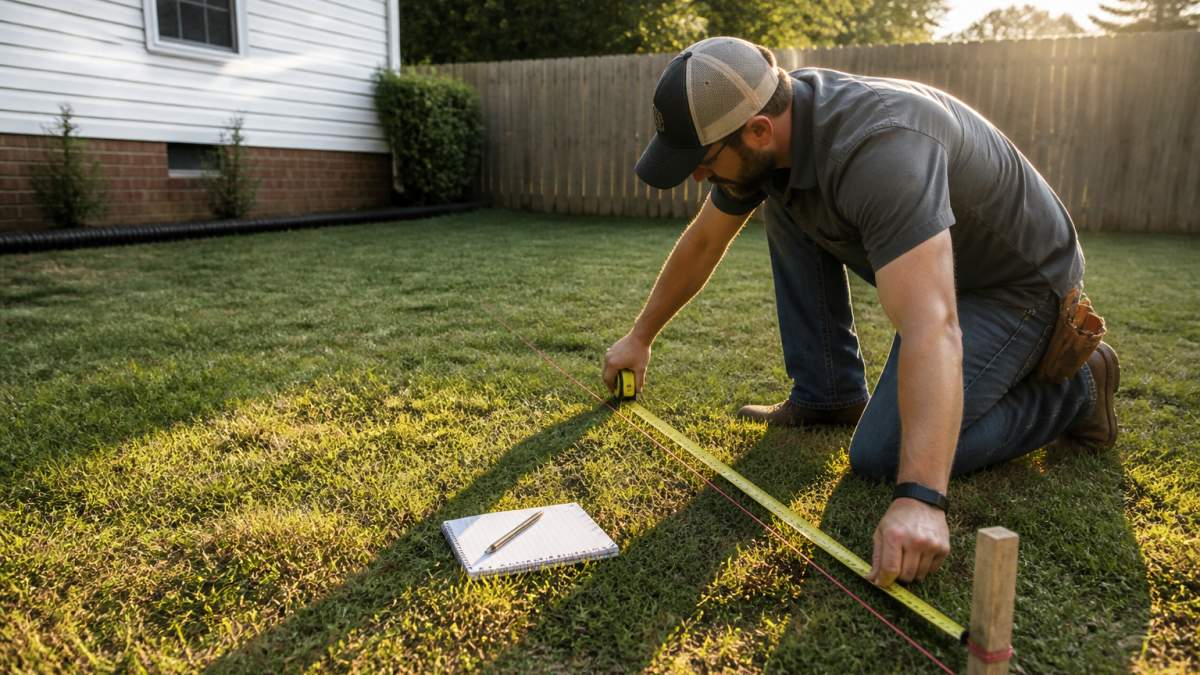
Here's the core idea: a fence is a series of straight runs, not one continuous loop. Measure each run separately, then add them up.
Before you stretch a tape, confirm where your property line actually sits. Our guide on how to verify property lines before you build or fence walks through that check.
Measuring Total Fence-Line Length
Walk the planned fence layout and measure each straight section in feet. Write every run down on its own line, then total them. Round up to the nearest foot on each run.
For curved or uneven stretches, measure in short straight segments and add them together. A string line pulled tight along the path gives you a cleaner read than eyeballing it.
You'll end up with a simple materials list starter:
- Run A: 40 feet
- Run B: 28 feet
- Run C: 18 feet
- Total fence length: 86 feet
That total is the number you'll feed into every calculation below.
Accounting for Gates and Corners
Gates break a fence run into pieces, and each piece needs its own posts. Subtract the gate opening from the total fence length before you count panels, then add the gate posts back in separately.
Corners matter too. A corner post carries load from two directions, so it needs to be set deeper and braced better than a straight-run post. Count every corner as its own post.
Choosing Fence Type, Style, and Height
Fence type decides your material list before you count a single board.
Height affects privacy and cost. Residential privacy fence heights vary, and local rules and HOA covenants can set a lower limit.
If you're still weighing styles, browse fence styles installed by Fencementals in the Midlands to see wood privacy, dog-eared, horizontal cedar, vinyl, and chain link side by side.
Then read our breakdown of handling HOA fence permit requirements. Height and style choices often hinge on those rules, and a rejected permit wastes both time and money.
Pick your type and height first. Every calculation that follows depends on them.
Privacy Fence Post Spacing and Post Quantity
Post spacing drives your entire post count, and post length drives your post order. Post spacing is a judgment call based on the fence design and site conditions. Tighter spacing means more posts and more concrete; wider spacing means longer rails that must be sized to carry the load.
Calculating the Number of Posts
Divide the total fence length by your post spacing, then add one for the end post. That gives you the post count for a straight run.
- Total fence length ÷ post spacing = number of sections
- Number of sections + 1 = number of posts
- Add one extra post for each corner and each gate
For an 86-foot run at eight-foot spacing: 86 ÷ 8 = 10.75 sections. Round up to 11 sections, then add one post. That's 12 posts before corners and gates.
Corners and gates each get their own post because they carry load from more than one direction. A corner post braces two runs; a gate post carries the swing and latch load.
Post Length: Above-Ground Height Plus Below-Ground Embedment
This is where most material lists go wrong.
The formula:
Post length = fence height + embedment depth + 6 inches of margin
Embedment depth depends on your frost line and soil. Setting posts below the local frost line helps prevent heaving, and embedment depth should match the local frost requirement and soil conditions.
Worked example for a six-foot fence with three-foot embedment:
- 6 feet above ground + 3 feet below ground + 0.5 foot margin = 9.5 feet
- Round up to the next common post length: 10 feet
So a six-foot privacy fence with three-foot embedment needs ten-foot posts, not six-foot posts. Ordering six-foot posts and splicing them is a recipe for a leaning fence.
Concrete and Post Count Together
Concrete quantity scales with post count and hole size, not fence length. Concrete quantity depends on hole diameter and depth, so measure one hole and check the bag yield printed on the product you buy. Multiply your total post count by your per-post bag estimate, then add a small contingency for spillage and uneven holes.
Calculate the total bags from your post count and the volume of one hole, and check the bag yield printed on the concrete you buy rather than guessing.
How Many Fence Boards Do I Need for a Privacy Fence?
Board count depends on panel width, picket width, and the gap between pickets. For a solid privacy fence, you want little to no gap so neighbors can't see through.
The basic math: convert your total fence length to inches, then divide by the combined picket width plus gap.
Picket Width, Spacing, and Privacy Coverage
Butting boards tight with no gap gives full privacy, and a small gap changes the look and how much is visible.
Work it out like this:
- Total fence length in inches ÷ (picket width + gap) = number of pickets
- Add a cut allowance for trimming and mistakes
- Round up to the next full board
Calculating Rails and Structural Components
Rails run horizontally between posts and carry the pickets. Rail count per section depends on fence height and wind exposure, and the right number is set by the fence design. More rails mean more fasteners and more cost, but they resist sag and wind load better.
Rail Quantity and Rail Length
Multiply your number of sections by rails per section to get rail count. For 11 sections with three rails each, that's 33 rails.
Rail length is a separate number. Rails span between posts, so each rail is roughly your post spacing minus the post thickness. Plan your cuts from that length and the rail lengths you can source.
Rail board count = total rail count ÷ rails yielded per board
For 33 rails at two per sixteen-foot board: 33 ÷ 2 = 16.5, round up to 17 boards.
Material-Specific Structural Components
The structural list changes with fence type, and mixing them up is a common ordering mistake:
- Wood privacy: four-by-four posts, two-by-four or two-by-six rails, pickets, galvanized nails or screws, joist hangers or rail brackets, post caps.
- Vinyl: pre-notched posts and rails sized to the system, routed pickets, vinyl-safe fasteners, post inserts or reinforcement for wind load. Vinyl systems often include rails in the panel kit, so count panels rather than rails.
- Prebuilt panels: each panel includes pickets and rails; you order panels plus posts plus brackets. Panel width (commonly six or eight feet) sets your post spacing, so panel count and post count move together.
The Small Parts That Sink a Budget
These add up fast and are easy to overlook on a first materials list:
- Concrete for post setting (one to two 50-pound bags per post)
- Galvanized nails or screws, roughly 30 to 40 fasteners per section for pickets plus rail brackets
- Joist hangers or rail brackets, one per rail end
- Gate hardware and hinges, plus a latch and any diagonal bracing
- Post caps, one per post
Count fasteners per section rather than per fence: pickets fasten to two or three rails, and each rail end needs a bracket. Count fasteners per section based on picket and rail layout, and buy them by the box and round up to avoid running short mid-build.
Using a Privacy Fence Material Calculator
A privacy fence material calculator does the arithmetic for you once you feed it the right inputs. Most ask for fence length, post spacing, picket width, rail count, and gate openings.
The calculator is only as good as your measurements. Enter a wrong run length and every output is wrong.
Use it as a double-check, not a replacement for understanding the math. When a calculator and your hand figures disagree, find out why before you order.
Enter dimensions carefully, select your fence style, and compare the output against your own notes.
A Complete Privacy Fence Worked Example
Let's run a full privacy fence through every step.
Step 1: Total length. 40 + 28 + 18 = 86 feet.
Step 2: Posts. 82 ÷ 8 = 10.25, round to 11 sections, plus one end post = 12 posts.
Step 3: Pickets. 82 feet = 984 inches. At 5.5-inch boards with no gap: about 179 pickets.
Step 4: Rails. 11 sections × 3 rails = 33 rails.
Step 5: Concrete. One to two bags per post, depending on hole size. At 16 posts, plan for 16 to 32 bags.
Waste, Cuts, and Contingency Allowances
Order extra. Every fence job produces cutoffs, and a board that splits or warps shouldn't send you back to the store mid-build.
A practical rule: add 10 percent to boards and pickets, and 5 percent to rails and posts. For our example, that's about 197 pickets, 35 rails, and 17 posts.
Sloped or irregular terrain eats more material than flat ground. Stepped panels and angled cuts mean more waste, so bump your allowance higher on uneven yards.
| Component | Base Quantity | Allowance | Order Quantity |
|---|---|---|---|
| Posts | 16 | 5% | 17 |
| Pickets | 179 | 10% | 197 |
| Rails | 33 | 5% | 35 |
| Concrete (bags) | 16-32 | 10% | 18-35 |
Get a Quote and Order Your Materials
Once your material takeoff is done, decide whether to build it yourself or bring in a crew. If you'd rather hire it out, see how a residential fence installation estimate works and request pricing.
For current prices or a quote, visit the Fencementals website. You can also compare material costs against privacy fence installation pricing.
At Fencementals, we're a locally owned, veteran-operated contractor serving the Midlands. We quote straight, with no hidden fees or upselling, and we keep the work site clean. We handle wood, vinyl, and chain link fencing.
Frequently Asked Questions
What size gap should there be between fence boards?
A wider gap between boards lets neighbors and passersby see through, so the right spacing depends on how much privacy you want.
How long should a 4x4 post be for a 6-foot fence?
Always check local building codes for frost line and depth requirements before digging, and confirm the post setting method with your local building department.
How do I calculate materials for a 300-foot privacy fence?
Start by dividing the total fence-line length by your panel width or post spacing, then add the post and rail counts for your design. Measure the total run and count sections carefully to avoid ordering too little.
How much material is needed for a 300-foot fence with gates?
Subtract the gate opening from the total fence length before counting panels, and account for gate hardware, hinges, and a latch kit. For a precise materials list tailored to your yard's terrain and gate placement, request a quote from Fencementals.
Measuring is the easy part. The hard part is trusting that your posts are set deep enough, your spacing is right, and your gate won't sag by spring. That's the work we do every week. Get started with Fencementals and get a fence built to stand the test of time.
