
Are There Signs of Poor Fence Installation?
Last Updated: October 25, 2026
Quick Summary
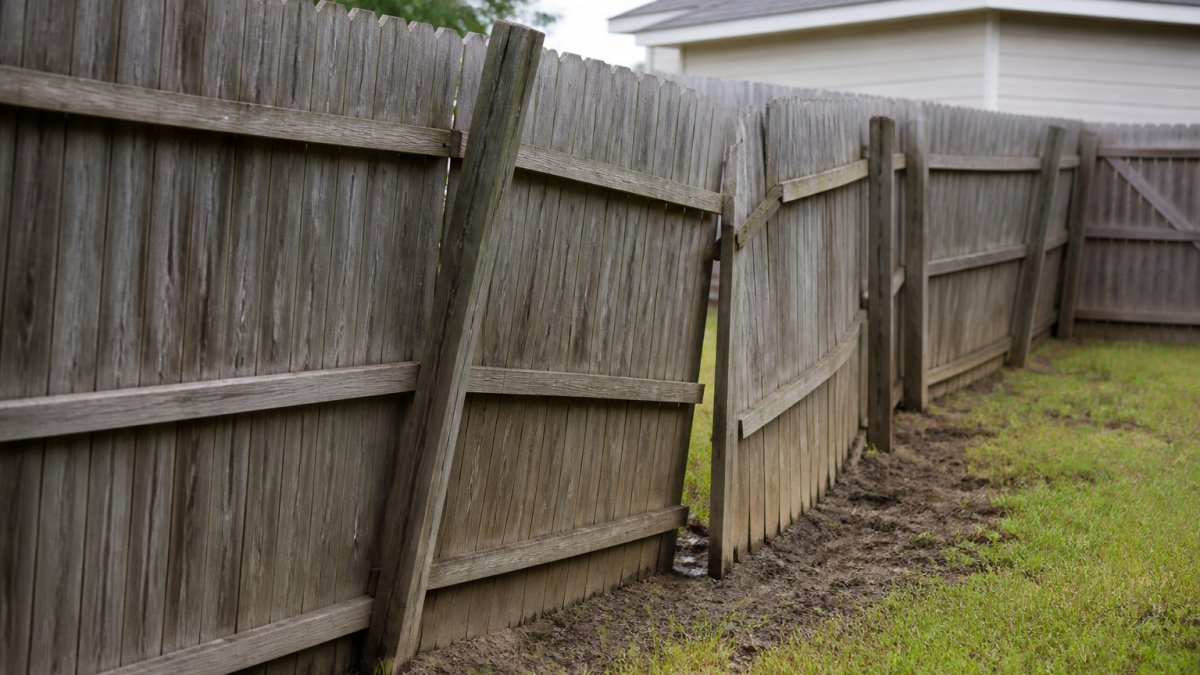
The clearest signs of poor fence installation are posts that lean, sink, or wobble when pushed, a fence line that wanders instead of running straight, and panels that rattle or pull away from the posts. Most defects show up in the first year, often in the first wet season. A problem that keeps getting worse is a defect, not normal settling.
- Push each post at shoulder height; a correctly set post does not move under hand pressure.
- A post out of plumb by more than about 1/4 inch over 4 feet is worth documenting.
- Wood privacy fences commonly run 6 to 8 feet between posts center-to-center.
- Do the inspection on a dry day, at least a week after the last rain.
- One bad post is a repair; six moving posts along a run means the install failed as a system.
Table of Contents
- Why Poor Fence Installation Shows Up Fast
- 7 Warning Signs of Poor Fence Installation
- How to Tell Installation Defects From Normal Settling
- Your Fence Installation Inspection Checklist
- How to Fix a Poorly Installed Fence
- Questions to Ask a Fence Contractor Before You Sign
- What a Fence Installation Warranty Should Cover
- Get a Quote and Protect Your Property
- Frequently Asked Questions
Why Poor Fence Installation Shows Up Fast
Most fence problems appear in the first year, not the tenth. That is the most useful fact about spotting signs of poor fence installation: bad work reveals itself quickly, while good work stays quiet for a decade or more.
At Fencementals, we get called out to fences two seasons old and already leaning. The homeowner always says the same thing: "It looked fine when they finished." It did, then the ground settled, the wood dried, and the shortcuts showed.
A fence fails early for a short list of reasons:
- Posts set too shallow for the soil and wind load
- Posts set in dirt instead of compacted gravel and concrete
- Panels nailed instead of screwed, or fastened with the wrong hardware
Each is an installation mistake, not a materials problem, and each leaves a visible signature you can check yourself.
7 Warning Signs of Poor Fence Installation
Here are the seven signs we check first on a service call. Any single one is worth a closer look; two or more together usually means the install was rushed.
- Posts that lean, sink, or wobble when pushed
- A fence line that wanders instead of running straight
- Gaps between boards, between panels, or at the base
- Panels that rattle, shift, or move by hand
- Pickets spaced unevenly along the run
- Warped, twisted, or cracked boards within the first year or two
- Panels pulling away from the posts
Now the detail on each group.
Leaning, Sinking, or Unstable Posts
A post that moves when you push it is the clearest sign of poor fence installation there is. A correctly set post does not budge under hand pressure.
Post problems trace back to depth and drainage. In heavy clay, water sits against the post and softens the ground; in sand, a shallow hole gives it nothing to grip.
If you are seeing early movement and want to understand the causes before you call anyone, our guide on how to prevent leaning fence posts covers the soil, depth, and drainage factors behind it.
Crooked Lines, Uneven Panels, and Gaps
A fence line should run straight between corners. If yours dips, bows, or steps in and out, the installer likely set posts by eye instead of by string line.
Gaps show up in three places:
- Between pickets, where spacing varies from one end of the run to the other
- Between panels and posts, where hardware pulled loose
- At the base, where the fence floats above uneven ground
That last one is common on sloped yards: a crew that won't cut or step panels leaves a gap at the bottom instead. It looks tidy from the street but does nothing for a dog that likes to dig.
Warping, Cracking, and Panels Pulling Away
Some wood movement is normal, boards swell in humidity and shrink in dry spells (Drying and control of moisture content and dimensional changes). Warping or twisting in the first year is not.
Panels pulling away from posts point to fastening. Nails back out under load. Screws hold. If you can see nail heads standing proud of the board, that panel is working itself loose.
How to Tell Installation Defects From Normal Settling
Normal settling is small, slow, and stops. A defect keeps getting worse. That is the test, but timing and material matter as much as the movement itself.
The timing test. Most defects show up in the first year, often in the first wet season.
Here is how the two compare, with the material-specific behavior that matters:
| What you see | Normal settling | Installation defect |
|---|---|---|
| Post lean | Slight, stops within a season | Keeps increasing |
| Fence line | Straight, minor soil dip | Visible bow or step |
| Board gaps | Even, seasonal swelling | Uneven spacing |
| Panel movement | None under hand pressure | Rattles or shifts |
| Wood condition | Gradual weathering | Warping or cracks in year one |
| Vinyl behavior | Slight flex in heat | Panels popping out of rails |
| Metal behavior | None | Rust at welds or base |
| Composite behavior | Minor expansion | Sagging between posts |
Material-specific signs. Wood: seasonal swelling is normal, but first-year cupping or twisting means green lumber or boards butted tight.
The benchmark check. Look at a fence that has stood for years nearby: straight lines, tight panels, posts that do not move. Our completed projects show what a properly set line looks like on the same kinds of yards and slopes you have.
Your Fence Installation Inspection Checklist
This is the checklist we would hand a homeowner. It takes about twenty minutes and four tools: a tape measure, a 4-foot level, a string line, and a notepad.
Post stability and plumb
- Push each post at shoulder height. A correctly set post does not move under hand pressure. Any rock, twist, or give is a flag.
- Hold a 4-foot level against two adjacent sides of each post. Plumb means the bubble sits centered; a post out of plumb by more than about 1/4 inch over 4 feet is worth documenting.
- Check that soil is firm and not cracked or pulling away from the concrete collar at the base.
Post spacing and depth
- Measure center-to-center between posts at three points. Wood privacy fences commonly run 6 to 8 feet; variation of more than an inch or two suggests posts were set by eye.
- Run a string line corner to corner and measure the gap at each post. Any post more than about 1/2 inch off the string is out of line.
Fence line and panels
- Sight down the run from one corner for bowing, stepping, or wandering.
- Check panel tops for consistent height; a low or high panel usually means posts set to different depths.
- Push each panel at mid-height. It should not move, rattle, or shift independently of the posts.
Board spacing and gaps
- Measure picket spacing at three points. Variation of more than about 1/8 inch is visible and usually means boards were laid out by eye.
- Check for base gaps, especially on slopes; wider than a few inches is a dog and privacy problem, not just cosmetic.
- Look for boards butted tight with no gap, wood needs room to move or it will cup and twist.
Gates
- Open and close each gate. It should swing free without dragging on the ground or binding on the latch.
- Check that the latch lines up without lifting the gate. A gate that has to be lifted to latch is sagging on its hinges.
- Confirm the gate frame is square by measuring diagonally corner to corner; the two measurements should match closely.
Material-specific checks
- Wood: look for cupping, twisting, or cracks in the first year, and for nail heads standing proud of the board.
- Vinyl: look for panels that have popped out of their rails, sagging between posts, and posts that flex more than the panels.
- Metal: look for rust at the weld points and at the base, and for posts that have shifted in the ground.
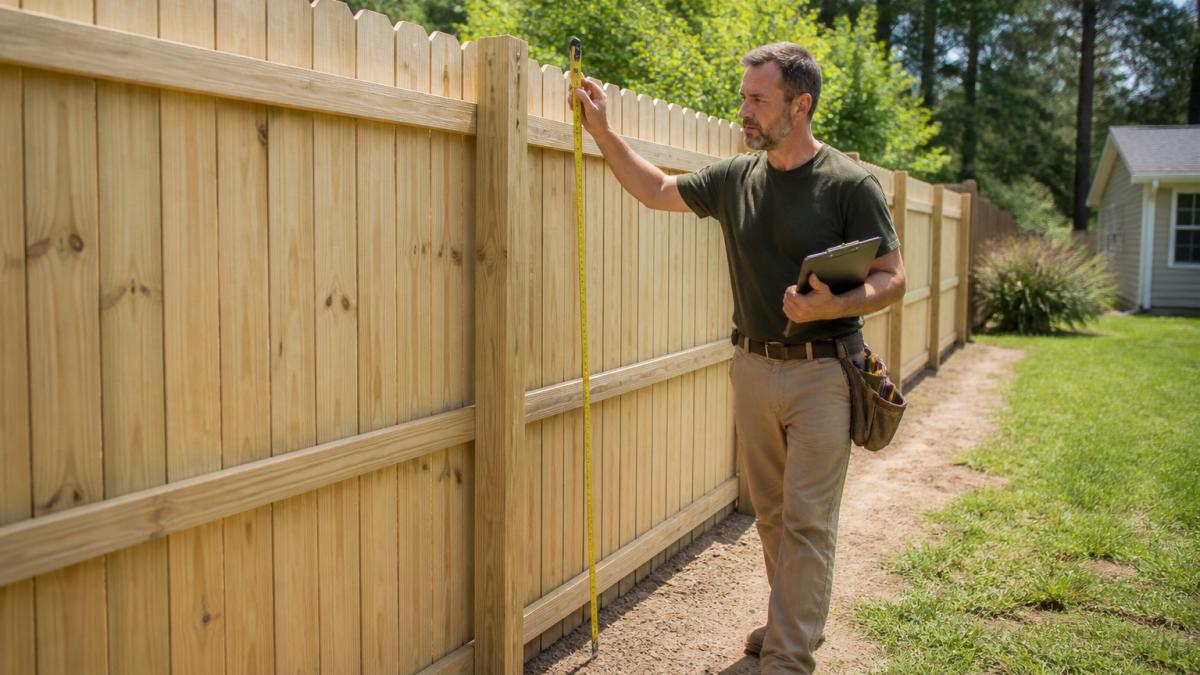
Photograph anything you find and note the date and measurement.
How to Fix a Poorly Installed Fence
Some problems are fixable. Others are not worth the labor.
Fixable in most cases:
- Loose panels, re-hung with proper screws
- Individual posts reset in deeper, better-drained holes
- Gates re-aligned on their hinges
Usually not worth fixing:
- A whole run set too shallow, where every post is moving
- Widespread warping from wet lumber
- A fence line that was never set straight to begin with
The decision comes down to how many posts are involved. One bad post is a repair; six along a run means the install failed as a system, and patching it just moves the problem down the line. Call the original installer first, most defects show up inside the warranty window.
Questions to Ask a Fence Contractor Before You Sign
Ask these before any deposit changes hands. The answers tell you more than the quote does.
- How deep do you set posts, and what goes in the hole?
- Do you use screws or nails on panels?
- How do you handle slopes and uneven ground?
That last one is not small talk: a crew that leaves the site clean tends to care about the work you cannot see either. For timelines, permits, and process, see our frequently asked questions.
What a Fence Installation Warranty Should Cover
A workmanship warranty should cover the installation, not just the materials. Material warranties come from the manufacturer and cover defects in boards or panels, not a post set too shallow or a panel nailed instead of screwed.
Look for coverage of:
- Post setting and structural stability
- Fasteners and hardware
- Gate alignment and operation
Ask how long the workmanship coverage runs and what voids it. You can also read our workmanship warranty to see what it covers. Normal weathering should not void it. Poor drainage you created after the fact might.
Get a Quote and Protect Your Property
Most fence failures we see were decided in the first afternoon of the job: how deep the holes went, what went in them, and whether anyone checked the line with a string.
Fencementals is locally owned and veteran operated, and we install wood, vinyl, and chain link across the Midlands. Three things shape how we work:
- Straightforward, honest pricing with no hidden fees or upselling
- Quality materials and solid workmanship, with posts set to hold
- A clean work site, because we treat your yard like our own
If you are ready to get real numbers, get a quote from Fencementals and start with a fence line that is still straight in five years. Our residential fence installation estimate guide walks you through getting an accurate estimate and protecting your investment.
Frequently Asked Questions
What are the signs of a poorly installed fence?
The most common signs of poor fence installation are leaning or sinking posts, crooked fence lines, uneven panel alignment, gaps between boards or at the base, loose or rattling panels, and warped or cracked wood. You may also notice panels pulling away from posts or a gate that drags and won't latch. Check these within the first few weeks after installation.
How do I know if my fence post was installed correctly?
A correctly set post stands straight, feels solid when you push on it, and holds its position through wet weather. Post depth matters: posts should be set with concrete or compacted gravel for stability. Check post spacing too. Posts set too far apart let panels sag. If a post wobbles by hand or has shifted after the first heavy rain, the setting was likely rushed or too shallow.
Can a poorly installed fence be repaired, or does it need to be replaced?
Many installation defects can be repaired. A single leaning post can often be reset, loose panels re-fastened, and gaps closed by adjusting pickets. Replacement makes more sense when posts are rotted below grade, concrete footings were never poured, or the fence line itself is badly out of square. Get an on-site assessment before deciding, and document the defects with photos in case you pursue a warranty claim.
How do I document problems with a new fence installation?
Photograph each defect in daylight from several angles, and include a tape measure in the frame to show gaps or out-of-plumb posts. Note the date, the weather, and how the problem changed over time. Keep your contract, permit paperwork, and any written warranty terms together. Then send a written notice to the installer describing each issue and requesting an inspection. A clear photo record and a dated paper trail make it much easier to resolve problems or, if needed, a formal complaint.
